− Table of content
If you need to display a picture, an <img> element is often enough.
But if you need to resize or transform this image, in different manners at several templates, the image plugin is very useful.
It can resize and transform the given image, store the result in a cache, and set the link to this new image in the html.
Using the plugin into a template 
The plugin is a template function, accepting at first parameter the source image. The given path is relative to the root web path (corresponding to your app/www directory).
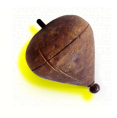
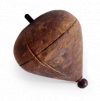
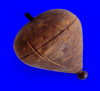
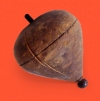
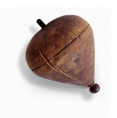
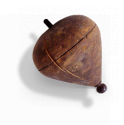
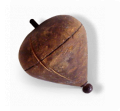
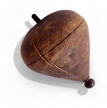
{image 'toupie.png'}
Here the image should be stored into yourapp/www/toupie.png.

The html code:
<img src="./toupie.png" />
Some attributes 
You can add a CSS class:
{image 'toupie.png', array('class'=>'right cadre')}
and/or an id:
{image 'toupie.png', array('id'=>'image')}
and/or an alternate text:
{image 'toupie.png', array('alt'=>'here picture of a whirligig')}
Some modifications 
You can transform the image in several ways. You can change for example its width.
{image 'toupie.png', array('width'=>100)}
It will call the GD librairy to change the width and generate a new image stored into "myapp/www/cache/images/"
So it will generate the following html with a link to the cached image (real url may be different):
<img src="cache/images/toupie_XXXXXXXXXXXXXXX.png"/>
If GD is not installed, the plugin just change the size with CSS. But the browser will load the original image.
{image 'toupie.png', array('width'=>100)}
<img src="toupie.png" style="width:100px;height:100px;"/>
Modifying the size 
You can set the width and/or the height. If you give only one of these measurement, the other will be calculated automatically.
  {image 'toupie.png', array('height'=>50)}
  {image 'toupie.png', array('width'=>100)}

You can set both, width and height, but probably the ratio will not be good and the image will be stretched.
{image 'toupie.png', array('width'=>150, 'height'=>50)}

To change the size by indicating the width and the height, and by respecting
the ratio, just add the omo attribute. If the resulting width or height are
higher than the expected with and height, the image will be cropped.
{image 'toupie.png', array('width'=>150, 'height'=>50, 'omo'=>true)}
You can also set new size of the image, by respecting the ratio and without cropping. Use maxheight and maxwidth instead of height and width. You can set a default background color for parts of the new image that are not part of the original image.
  {image 'toupie.png', array('maxwidth'=>100, 'maxheight'=>90,'background'=>'#0000ff')}
  {image 'logo_1.png', array('maxwidth'=>100, 'maxheight'=>90)}
  {image 'logo_2.png', array('maxwidth'=>100, 'maxheight'=>90,'background'=>'#ff0000')}
![]()
![]()
Faire un zoom 
Changing the size of the image allow to zoom in/out on the image. But for this
behavior, there is an other attribute: zoom.
Give:
- 100 to display at the same original size (100%)
- 10 to display at 10% of the original size
- 110 to display at 110% of the original size
{image 'toupie.png', array('width'=>100, 'zoom'=>50)}
Aligner et déplacer 
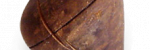
After cropping the image, you can indicate to "move" the image inside the new frame.
You can align to the left:
{image 'toupie.png', array('width'=>100, 'zoom'=>60, 'alignh'=>'left')}
or to the right:
{image 'toupie.png', array('width'=>100, 'zoom'=>60, 'alignh'=>'right')}
At the top:
{image 'toupie.png', array('width'=>100, 'zoom'=>60, 'alignh'=>'top')}*
At the bottom
{image 'toupie.png', array('width'=>100, 'zoom'=>60, 'alignh'=>'bottom')}
Modifying the format and the quality l'extension et la qualité 
You may want to convert a png to jpg for example, and to reduce the quality of the image (so the resulting image will take less bandwidth)
{image 'toupie.png', array('width'=>100, 'ext'=>'jpg')}

Note that the jpeg format does not support transparency
{image 'toupie.png', array('width'=>100, 'ext'=>'jpg', 'quality'=>5)}
Modifying the background color 
If you want to change transparent background of a png:
{image 'toupie.png', array('width'=>100, 'background'=>'#ff5533')}

On a jpeg converting from a png:
{image 'toupie.png', array('width'=>100, 'ext'=>'jpg', 'background'=>'#ff5533')}
Adding a box shadow 
You can add a box shadow on an image. Note that it is probably more interesting to add a box shadow with CSS instead of using this plugin. This feature was developped years ago when browsers didn't support CSS shadows.
{image 'toupie.png', array('width'=>100, 'shadow'=>true)}
You can change the width and the angle of the shadow:
{image 'toupie.png', array('width'=>100, 'shadow'=>true, 'soffset'=>20)}
{image 'toupie.png', array('width'=>100, 'shadow'=>true, 'sangle'=>0)}
To change the blur of the shadow (maximum 11):
{image 'toupie.png', array('width'=>100, 'shadow'=>true, 'sblur'=>0)}
Or to change its opacity (in %)
{image 'toupie.png', array('width'=>100, 'shadow'=>true, 'sopacity'=>100)}

Or its color:
{image 'toupie.png', array('width'=>100, 'shadow'=>true, 'scolor'=>'#ffff00')}